Hey there! Are you planning an event and looking for an easy and efficient way to handle RSVPs? Look no further than Google Forms!
In this post, we’ll show you how to set up an RSVP form using the powerful and user-friendly tool.
Not only will it make the RSVP process a breeze for you and your guests, but it will also help you keep track of attendance and plan accordingly.
So, whether you’re organizing a birthday party, a business conference, or a community event, read on to learn how to take the hassle out of RSVPs with Google Forms.
Setting up a Google Form
Alright, let’s get started! First things first, you’ll need a Google account to access Google Forms.
If you don’t have one already, sign up for one at https://accounts.google.com/signup. Once you’re logged in, head to forms.google.com to access the Forms homepage.
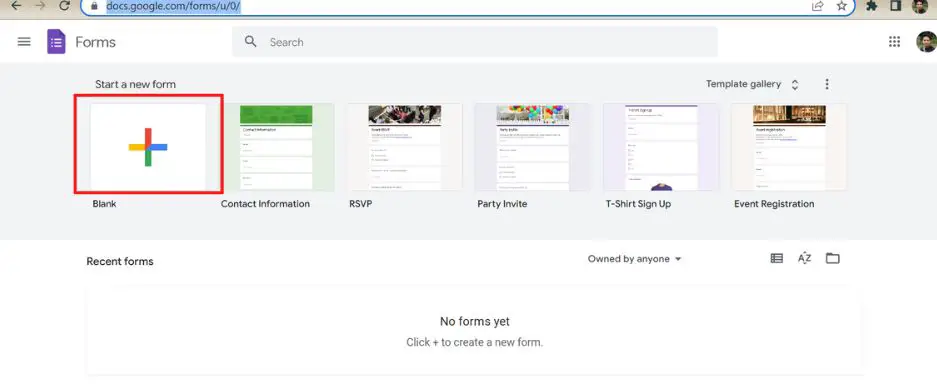
Next, click on the plus button to create a new form. You’ll then be prompted to name your form and choose a template. For our purposes, we’ll select “Blank” template.
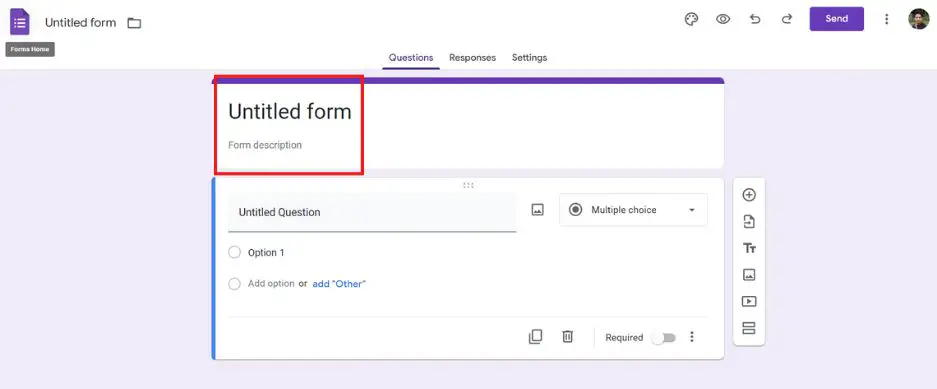
Now it’s time to customize your form and add the necessary fields for an RSVP. To do this, click on the “Untitled question” field and change the question to “Name.”
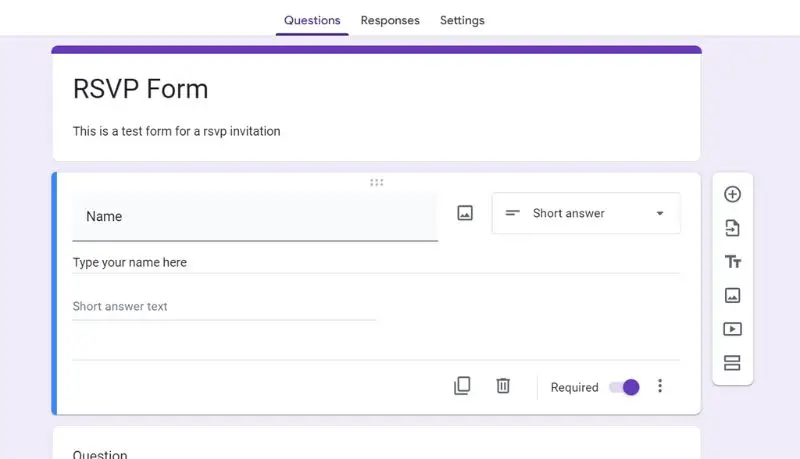
You can then click on the three dots on the right side of the question to access more options. Here, you can make the question required, add a description, or change the type of question.
Next, add the fields “Email” and “Number of Guests” in the same way. You can also add other fields such as “Phone Number” or “Dietary Restrictions” if needed.
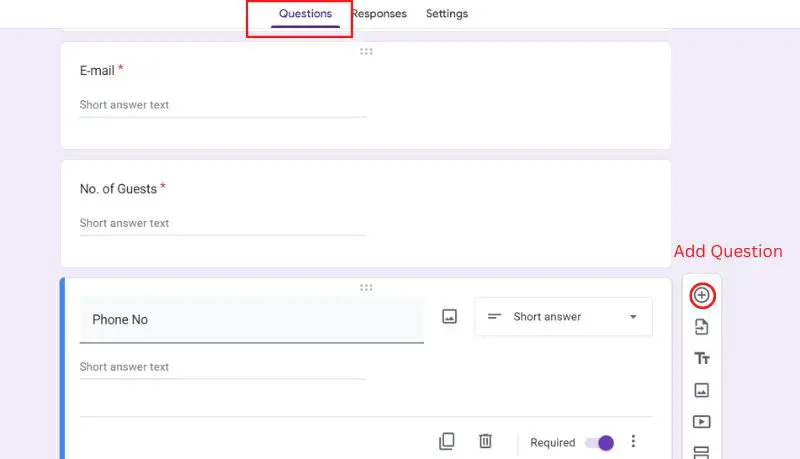
Once you’ve added all the necessary fields, you can preview your form by clicking on the “Preview” button at the top of the page. This will give you an idea of how the form will look to your guests.

And that’s it! Your RSVP form is now set up and ready to go. In the next section, we’ll show you how to add a confirmation message and collect responses. Stay tuned!
Adding a Confirmation Message
Now that your RSVP form is all set up, let’s add a confirmation message or redirect your guests to a thank-you page after they submit their responses.
This is a great way to show your guests that their RSVP has been received and give them any additional information they need for the event.
To add a confirmation message, go to the “Settings” button on the top right corner of the form editor. Next, select “Confirmation” from the options on the left-hand side.
Here, you can choose to show a message or redirect to a thank-you page.
If you choose to show a message, you can customize the text to say whatever you like. You can also add images or videos to make your message more visually appealing.
If you choose to redirect to a thank-you page, you can enter the URL of the page you want your guests to be directed to after they submit the form.
This can be a thank-you page on your website, or a page with additional information about the event.
You can also change the confirmation message to a different language, if you have guests from different countries.
That’s it! Your RSVP form is now fully set up, and your guests will receive a confirmation message after they submit their responses. Your guests will appreciate the confirmation message and it will give them a peace of mind.
In the next section, we’ll show you how to collect responses and stay organized with Google Forms. Keep reading!
Collecting Responses
Congratulations, your RSVP form is now live and ready for guests to fill out. But how do you keep track of all those responses? Lucky for you, Google Forms makes it easy to view and organize your responses in a Google Sheet.
First, go to the form editor and click on the “Responses” tab. Here, you’ll see a summary of all the responses, including the number of responses and a graph of the responses to each question.
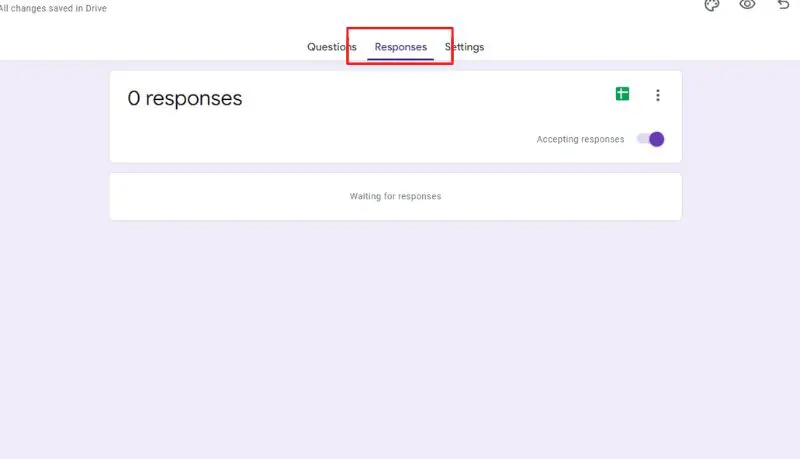
To view all the responses in a Google Sheet, click on the “Google Sheets” button. This will automatically create a new sheet with all the responses in a tabular format.
You can then use the built-in spreadsheet functions to sort, filter, and analyze your data.
You can also set up email notifications for new responses. To do this, go to the “Settings” button and select “Responses” from the options on the left-hand side.
Here, you can enter the email address where you want to receive notifications and choose how often you want to receive them.
This way, you’ll stay on top of the RSVPs and you can plan your event accordingly.
Another useful feature is that you can export the responses to excel or csv file, if you want to use them in another program.
With Google Forms, collecting and organizing your RSVPs is a breeze. You’ll have all the information you need to plan and execute a successful event.
In the next section, we’ll show you how to customize the form’s look and feel to make it more visually appealing. Stay tuned!
Customizing the Form’s Look and Feel
Now that your RSVP form is set up and ready to go, let’s add some finishing touches to make it more visually appealing.
After all, first impressions count, and you want your guests to have a great experience when filling out the form.
One of the easiest ways to make your form look more professional is to change the theme. To do this, go to the “Settings” button and select “Theme” from the options on the left-hand side.
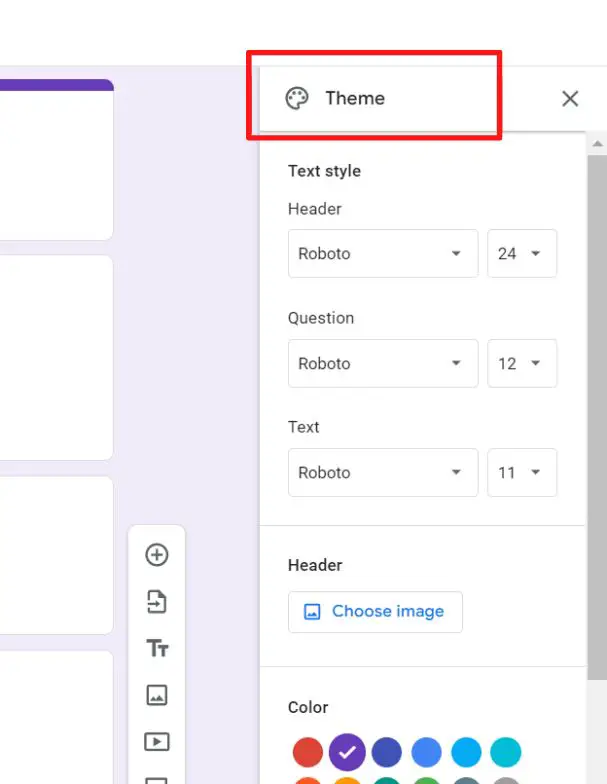
Here, you’ll see a variety of pre-made themes to choose from. You can also create your own custom theme by selecting a background color, font, and accent color.
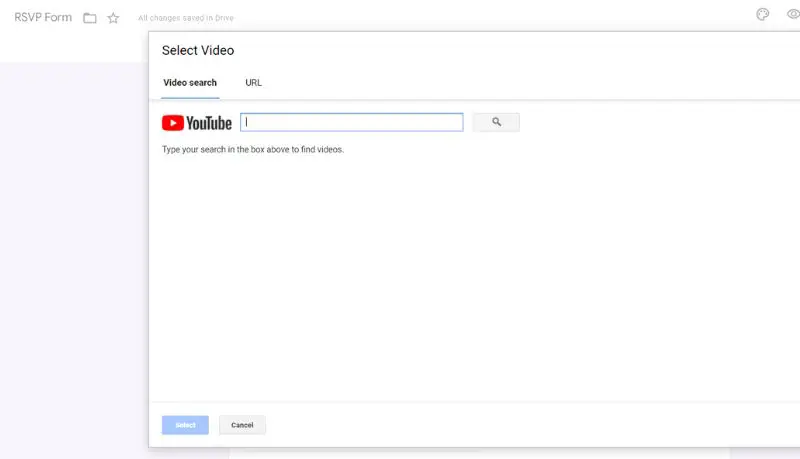
Another great way to make your form more visually appealing is to add images or videos. You can add images to the form by going to the “Background” tab in the “Settings” menu, and then upload an image.
You can also add a video by pasting a YouTube or Vimeo link. This will give your guests a sense of the event before they even attend.
You can also use the Form’s layout to make it more visually appealing. There are many options available in the layout menu that allows you to change the layout of your form and make it more user-friendly.
Finally, you can add a logo to your form by going to the “Header” tab in the “Settings” menu and upload an image. This will help your guests to easily identify the form and the event.
With these tips, your RSVP form will look professional and engaging, and your guests will have a great experience filling it out.
In the next section, we’ll show you how to use Google Forms to send reminders to your guests before the event. Stay tuned!
Using Google Forms to Send Reminders
With your RSVP form set up and looking great, it’s time to think about how you’ll remind your guests about the event.
Thankfully, Google Forms makes it easy to send reminders to your guests, so you can be sure that everyone has the event details fresh in their minds.
First, go to the form editor and click on the “Responses” tab. Here, you’ll see a summary of all the responses, including the email addresses of your guests.
Next, go to the “Google Sheets” button, this will open the sheet with all the responses in a tabular format. You can then use the built-in spreadsheet functions to sort, filter, and analyze your data.
Now, you can use the “Mail Merge” add-on to send personalized emails to your guests. This add-on allows you to create personalized emails with a single click, and you can schedule them to be sent out at a specific time.
You can also use the Google Form’s “Reminder” feature, which allows you to set up reminders for your guests. To do this, go to the “Settings” button and select “Reminders” from the options on the left-hand side.
Here, you can enter the email address of your guests, set the reminder date and time, and write the reminder message.
These are just a few ways to use Google Forms to send reminders to your guests. With these tools, you’ll be able to keep your guests informed and excited about your event, and you’ll be able to plan accordingly.
In conclusion, Google Forms is a powerful and user-friendly tool that can help you streamline the RSVP process, keep track of attendance, and send reminders to your guests.
With the step-by-step instructions in this post, you’ll be able to set up your own RSVP form and take the hassle out of event planning.
Conclusion
Wow, we’ve covered a lot of ground in this post! To summarize, we’ve shown you how to set up an RSVP form using Google Forms, add a confirmation message and redirect users to a thank-you page, collect responses and stay organized, customize the form’s look and feel, and send reminders to your guests.
Through this post, you’ve learned how Google Forms can make the RSVP process a breeze for you and your guests, and help you keep track of attendance and plan accordingly. You’ve also learned how to customize the form to make it more visually appealing and user-friendly, and how to use the built-in features to send reminders to your guests.
In short, using Google Forms for your event’s RSVPs can save you a lot of time and hassle, and make the event planning process much more efficient and organized.
We hope this post has been helpful in showing you the benefits and capabilities of using Google Forms for your event’s RSVPs. If you have any questions or feedback, please let us know in the comments below.
Happy event planning!
Bonus
Sharing your form and setting permissions to access the response data is an important step in the process.
To share your form, go to the form editor and click on the “Send” button at the top of the page. Here, you’ll see options to share the form via a link, email, or social media.
You can also embed the form on your website or send it directly to specific individuals or groups.
It’s important to note that when you share the form, you can also set permissions to control who can view and edit the form and the response data. To do this, go to the form editor and click on the “Settings” button.
Select “Collaborators” from the options on the left-hand side. Here, you can add the email addresses of the individuals or groups you want to share the form with and set their level of access.
By default, anyone with the link can view the form, but you can change it to “Only people in my organization” or “Only people with the link” to limit who can see the form.
You can also set permission to the response data, like who can view, edit or comment on the response data. This can be done in the same Collaborators settings.
By following these steps, you’ll be able to share your form and control who can access the response data, giving you peace of mind that your data is secure and only accessible to the right people.


