If you’re a tech-savvy individual, chances are you’ve heard of the BIOS before.
But for those who might not be familiar, the BIOS (Basic Input/Output System) is a crucial component of your computer that helps to manage the communication between your hardware and software.
It’s essentially the “brain” of your computer and controls everything from booting up to running your operating system.
Now, there are times when you may need to access the BIOS to make some changes or troubleshoot an issue.
However, the usual method for accessing the BIOS involves restarting your computer and pressing a specific key during the startup process.
This can be a bit of a hassle, especially if you’re in the middle of something important and don’t want to lose your progress.
That’s why in today’s blog post, we’re going to be discussing three methods for accessing the BIOS on a Windows computer without the need for a restart.
So if you’ve ever found yourself in a situation where you needed to get into the BIOS but didn’t want to restart your computer, this post is for you! Stay tuned.
Using the System Configuration tool
let’s talk about using the System Configuration tool to access the BIOS without restarting.
To get started, open the Start menu and search for “System Configuration”. Click on the “System Configuration” result to open the tool.
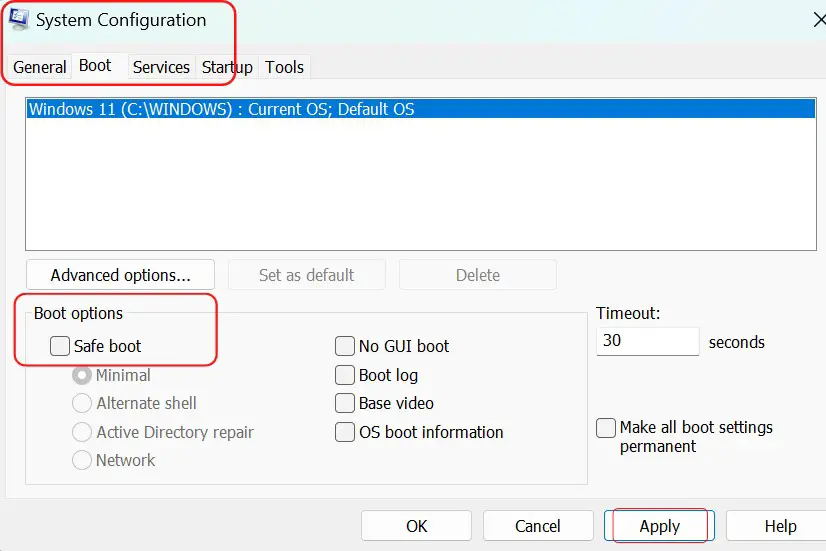
Once you’ve opened the System Configuration tool, click on the “Boot” tab. In the “Boot Options” section, you’ll see a checkbox labeled “SAFEBOOT”. Uncheck this box and then click on the “Apply” button.
Next, click on the “Boot” tab again. You’ll see a list of boot options in the “Boot options” section. Scroll down until you see the option for the BIOS, which will typically be listed as “BIOS” or “UEFI Firmware Settings”.
Click on the BIOS option and then click on the “Set as default” button. This will set the BIOS as the first boot option, so the next time you start your computer, it will automatically boot into the BIOS.
And that’s it! By using the System Configuration tool, you’ve set the BIOS as the first boot option and can access it without the need for a restart.
Just be sure to remember to set your boot options back to their original settings once you’re finished in the BIOS.
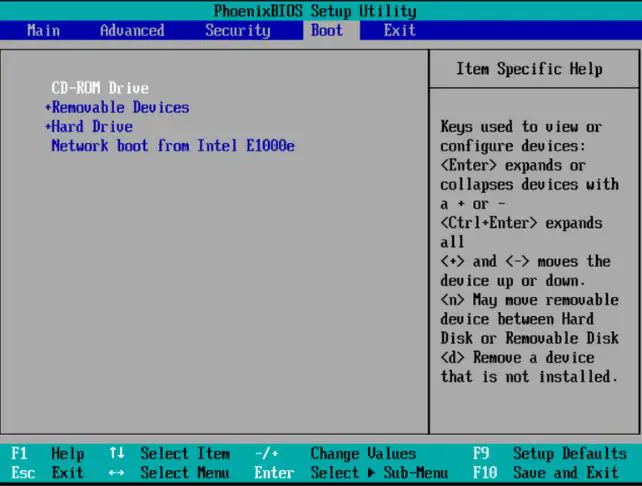
Accessing the BIOS through the boot menu
The boot menu is a menu that allows you to choose which device you want to boot from. It’s usually accessed by pressing a specific key during the startup process (e.g. F12 for Dell computers, Esc for HP).
The key you need to press will usually be displayed on the screen as your computer is starting up, so keep an eye out for it.
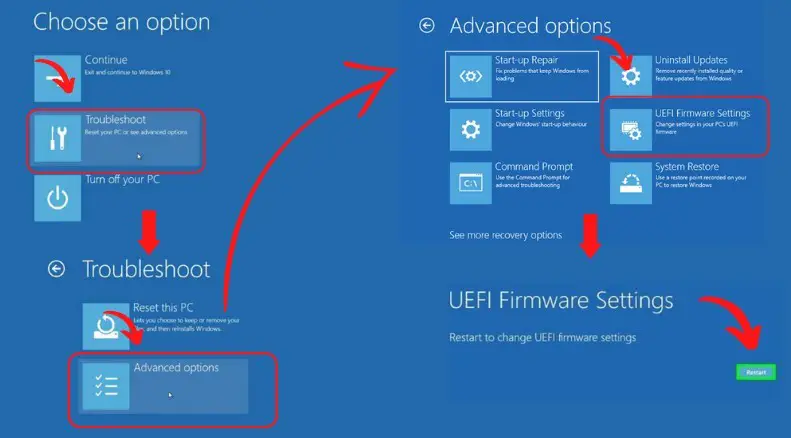
Once you’ve accessed the boot menu, you’ll need to navigate through it to select the option to enter the BIOS. This will typically be listed as “BIOS” or “UEFI Firmware Settings”.
Note that the exact steps for accessing the boot menu and navigating through it may vary depending on your specific computer.
For example, on a Lenovo computer, you’ll need to access the boot menu through the UEFI firmware settings rather than by pressing a key during startup.
If you’re not sure how to access the boot menu on your particular machine, it’s always a good idea to consult the documentation or support for your specific computer.
Once you’ve located the option to enter the BIOS, simply select it and press enter to access the BIOS. And that’s it! You’ve successfully accessed the BIOS through the boot menu without needing to restart your computer.
Using a Windows command
Our final method for accessing the BIOS without a restart involves using a Windows command.
This method is a bit more advanced, but can be a quick and convenient way to access the BIOS if you’re comfortable using the Command Prompt.
To get started, open the Start menu and search for “Command Prompt”. Right-click on the “Command Prompt” result and select “Run as administrator” to open the Command Prompt with elevated privileges.
Once you’ve opened the Command Prompt, enter the following command:
bcdedit /set {bootmgr} path \EFI\Microsoft\Boot\bootmgfw.efi
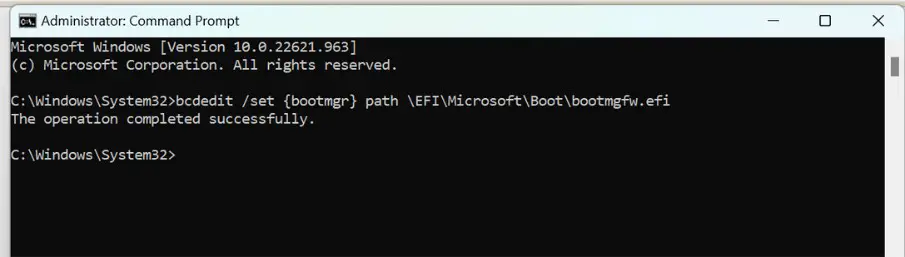
This command will set the BIOS as the first boot option, so the next time you start your computer, it will automatically boot into the BIOS.
And that’s it! By using this command, you’ve set the BIOS as the first boot option and can access it without the need for a restart. Just be sure to remember to set your boot options back to their original settings once you’re finished in the BIOS.
Of course, it’s always a good idea to be cautious when using commands in the Command Prompt, as entering the wrong command can potentially cause problems with your system.
So if you’re not comfortable using the Command Prompt, it’s probably best to stick with one of the other two methods we discussed earlier.
Conclusion
And that’s it! We’ve covered three different methods for accessing the BIOS on a Windows computer without the need for a restart: using the boot menu, using the System Configuration tool, and using a Windows command.
To recap, the first method involves accessing the boot menu and selecting the option to enter the BIOS. The second method involves using the System Configuration tool to set the BIOS as the first boot option.
And the third method involves using a command in the Command Prompt to set the BIOS as the first boot option.
It’s worth noting that these methods may not work on all computers, and that it’s always a good idea to consult the documentation or support for your specific computer for more information on accessing the BIOS.
We hope you’ve found this information helpful, and that you now feel more comfortable accessing the BIOS without the need for a restart. As always, if you have any questions or need further assistance, don’t hesitate to reach out to us.


